This is the hub for all the information relating to a specific bus, coach or rail route listing in the Scenic Listing Manager.
Once you’ve clicked to edit a published or draft route from the routes dashboard you will be taken to the Route Editor, it’ll look something like this:
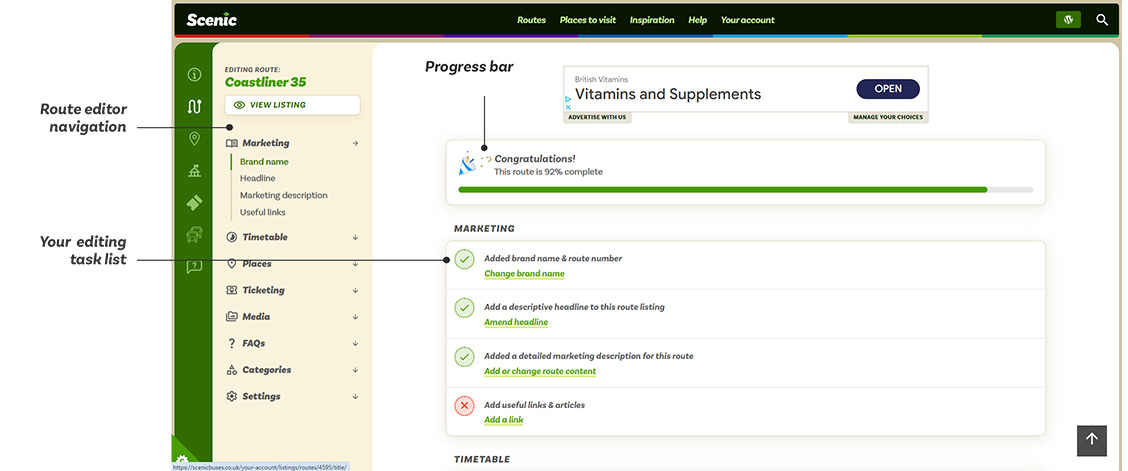
What’s in the Route Editor?
There are a few key things to note from the Route Editor.
The editor navigation
Here you’ll find an accordion-style list of all the pages in the editor. You can see this navigation at all stages of editing a route. It’s your anchor to navigating through the route editor.
You’ll see the route name in green at the top – this is a link to the Route Editor dashboard, where you can view your progress and any alerts about your listing.
We’ve split the navigation into its key areas, making it easier for you to edit parts of your listing through the Scenic Listing Manager.
The progress bar
We wanted to make it super simple for you to see, at a glance, how complete your listing is. Don’t worry if it’s not 100% – very few listings are – but so long as you’re above 75% you’re all good.
This progress bar tracks you as you complete tasks from the list below – from your task list. Your progress score may go down as content ages – particularly timetables, maps and tickets.
It’s important you keep those bits of data up to date – there’s nothing worse than out of date information for your passengers.
The task list
Here you’ll find all of the tasks you need to complete for a listing.
- Tasks with a green tick are complete
- Tasks with a red cross are incomplete
- Tasks with an amber warning sign are partially complete
The more green and amber tasks the more complete your progress is.
To complete a task, simply click on the green link attached to that task and it’ll take you through to another page. Follow the on-screen instructions for how to complete that task.
We’d recommend you follow the steps in order to make your editing experience easier. You’ll find helpful links at the bottom of every form in the Scenic Listings Manager guiding you to the next step in the process, like this:
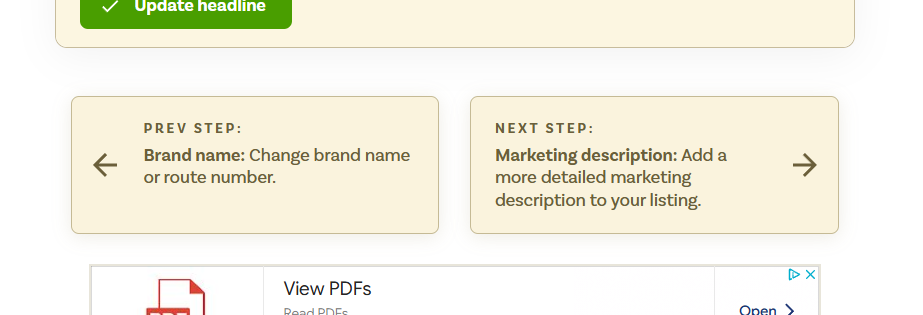
These allow you to go back to the previous page and forward to the next step. This is what we call the Wizard Navigation.
Preview or view buttons
These are buttons you can click to see exactly how your listing looks after you have made changes in the Scenic Listings Manager.
Under the route name in the editor navigation, you’ll see a white button that will say either:
- View listing
This is shown on published routes – any changes made to the listing are published immediately. - Preview listing
This is shown on draft routes – any changes made are only for you to see.
You can view the screenshot at the top of this page to see what this button looks like.
Find out more about the difference between draft and published routes in the Scenic Docs.
Leave a Reply